Today, we’re making an incredibly creamy, rich, and naturally sweet Homemade Chiku Kulfi Ice Cream that can easily rival any store-bought ice cream!
If you’re looking for a chilled, delicious, and royal-style dessert to enjoy during the summer season, then this recipe is an absolute must-try. Its smooth texture, refreshing flavor, and natural sweetness from ripe chikoo make it a perfect homemade treat for the whole family.
To begin, take 5 ripe and soft chikoo. The riper the chikoo, the creamier and naturally sweeter your ice cream will turn out.
In a bowl, pour ½ litre milk and add 1 tablespoon vanilla-flavored custard powder.
Mix it thoroughly until the custard powder dissolves completely. Make sure there are no lumps in the mixture, as a smooth custard base is the secret to achieving a perfectly creamy ice cream texture.
Once the custard is fully blended into the milk, transfer the mixture to a pan.
Turn on the heat and cook it over a medium flame.
Keep stirring continuously while cooking. Since custard powder has been added, the milk can stick to the bottom of the pan if left unattended. Constant stirring also helps create a silky and smooth consistency.
As the mixture cooks, you’ll notice the milk gradually becoming thicker and creamier, while the kitchen fills with an irresistible aroma.
Now add ¼ cup sugar and continue cooking until the mixture comes to 2–3 gentle boils. This step enhances the richness and gives the kulfi a luxurious creamy texture.
Once the mixture becomes perfectly thick and creamy, switch off the flame and allow it to cool completely.
Step 2: Prepare the Chikoo
Now comes the star ingredient — the delicious and juicy Chikoo! Peel 1 chikoo, remove the seeds, and cut it into small bite-sized pieces
These tiny chikoo chunks will add delightful fruity bites to the ice cream, making every spoonful extra delicious..
Next, roughly chop the remaining 4 chikoo and add them to a blender jar.
Pour in the cooled custard milk mixture and add a pinch of cardamom powder, which gives the dessert a wonderfully rich and royal flavor.
Blend everything together until smooth and creamy.And there you have it — a thick, luscious, and tempting chikoo mixture ready for freezing!
Step 3: Freeze the Ice Cream
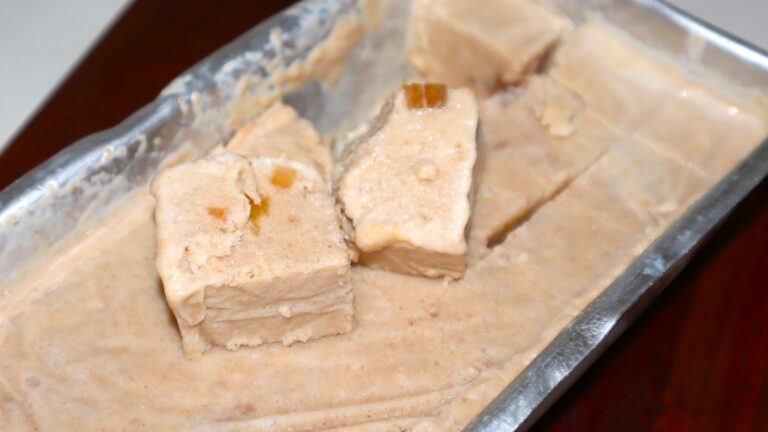
Transfer the prepared mixture into an airtight container or any container suitable for setting ice cream.
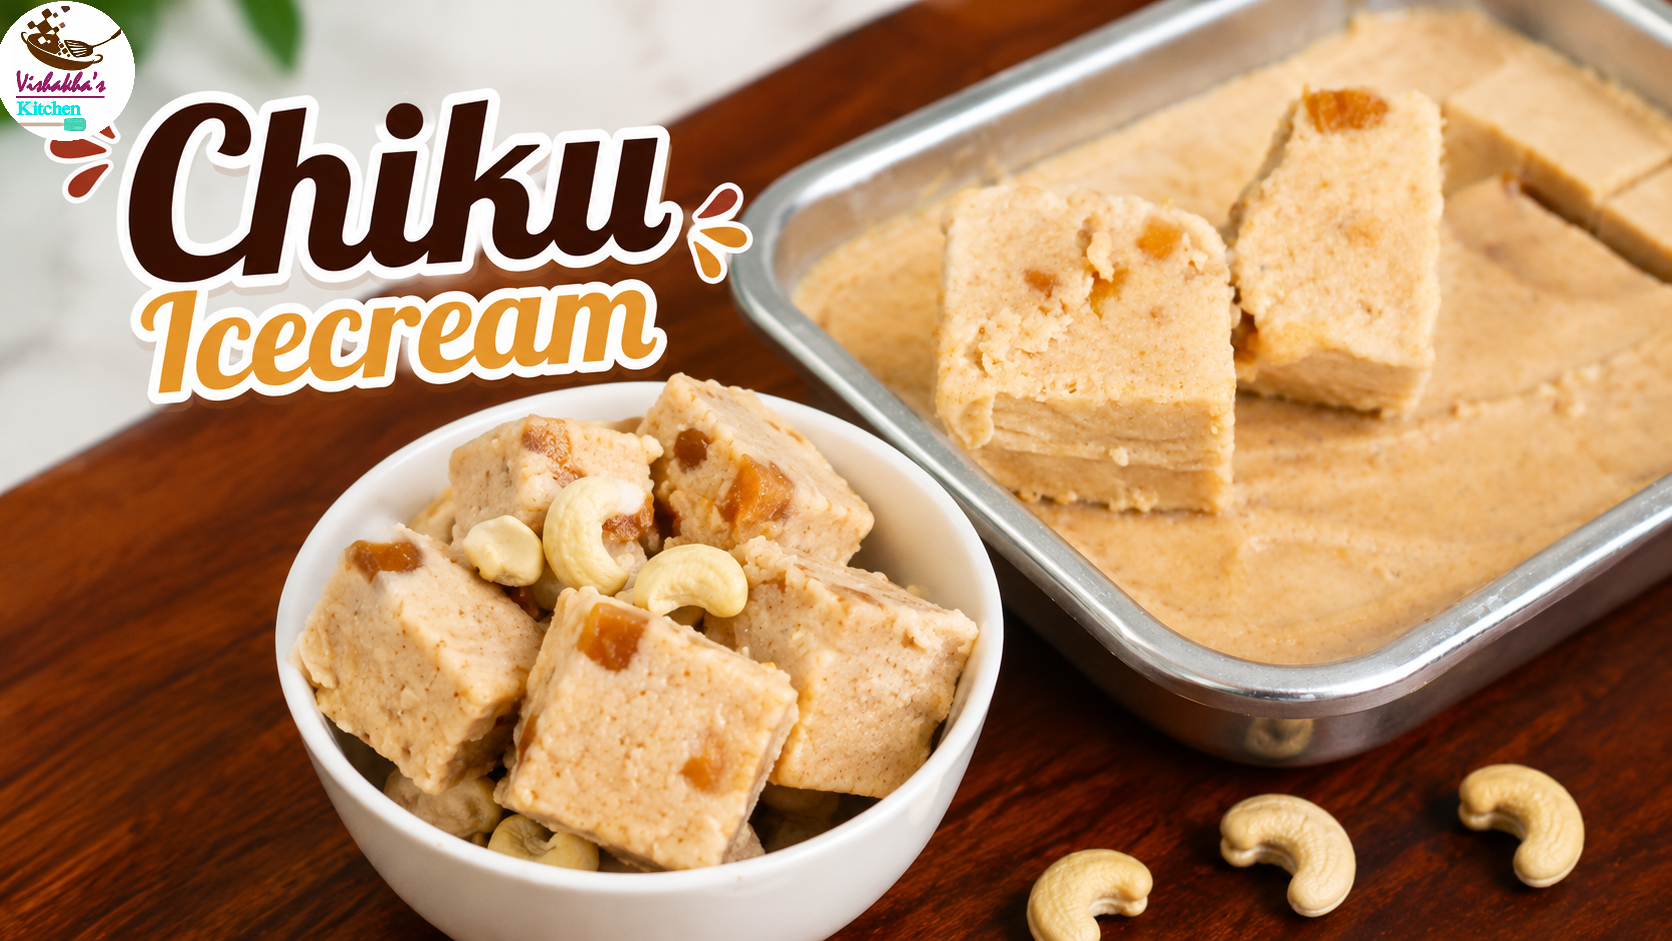
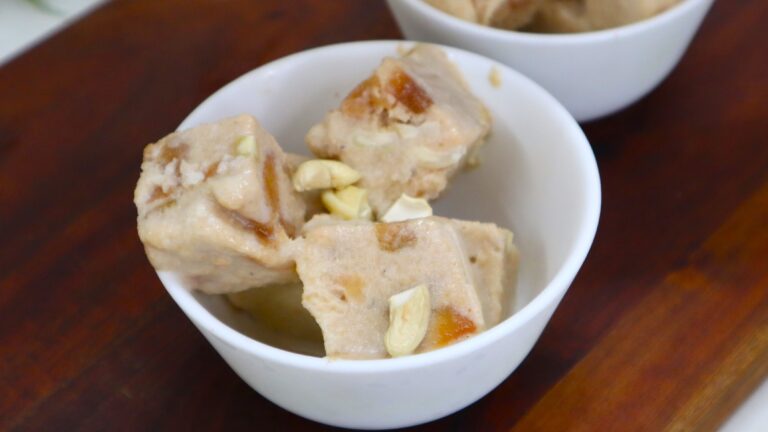
Now sprinkle on top Chopped cashew cashews and Fresh chikoo pieces.. These little chikoo bites make the kulfi even more flavorful and enjoyable.
Cover the container tightly with a lid or cling wrap and place it in the freezer for about 8–9 hours, or until fully set.
Step 4: Serve and Enjoy
After 8–9 hours…Wow! our super creamy, rich, and delicious Chiku Kulfi Ice Cream is perfectly set and ready to enjoy.
Slice or scoop the kulfi into serving bowls. Garnish with a few more chopped cashews on top for an extra crunchy touch.
Now enjoy this chilled, creamy, and refreshing homemade chikoo dessert with your family and friends.
This summer, skip the expensive store-bought ice creams and make this healthy, creamy, and flavorful Homemade Chiku Kulfi Ice Cream right in your own kitchen.
The natural sweetness of ripe chikoo combined with the richness of milk and the aroma of cardamom creates a truly irresistible dessert experience.
I’m Vishakha, the heart and soul behind Vishakha’s Kitchen — where I share my love for cooking, experimenting with flavors, and creating homemade dishes that bring people together...